Rather than the link - As the author I've pasted it here.
Your comments on any game errors appreciated
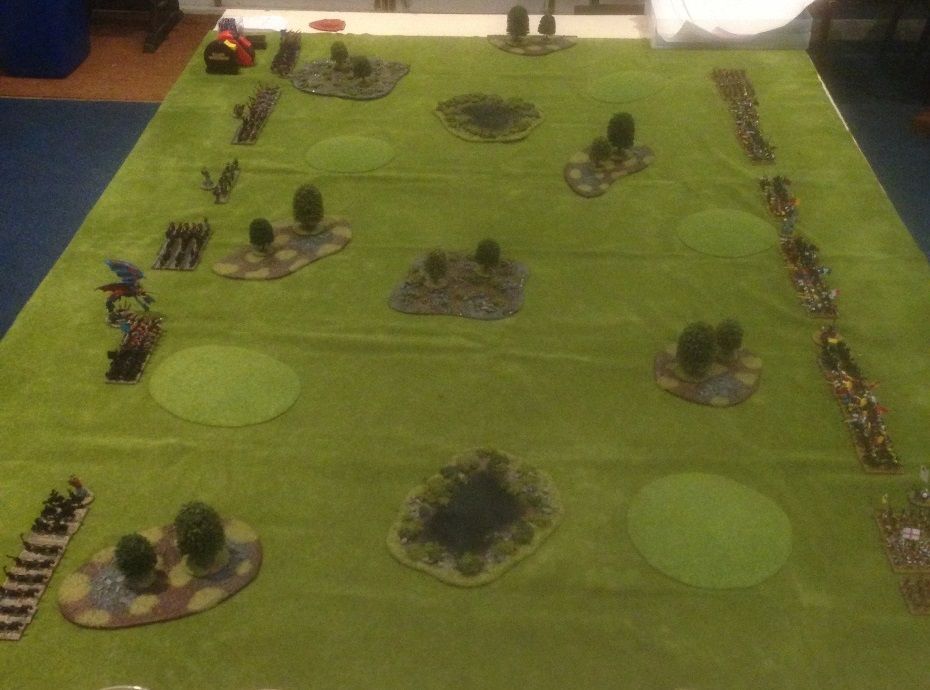
Brettonians (Russ) on the right line up against Chaos (Stormwind).
Players rolled to choose board edge.
Each player sketched their line up and when both were ready placed their troops, this is something we have recently deicded to do for simple engagments. We like this as it means troops aren't always placed to immediately counter threats as often happens if you set up unit by unit. In one game played both sides refused the western flank and effecitvly played on a 4x4 board, in another each side refused their own right flank and the first turn consisted of manouvers to attain an attack position. Of course you learn your opponents favourite positions so you anticiapte, but then so does he.
As this was a 2000 point battle there wasn't a lot of empty board.
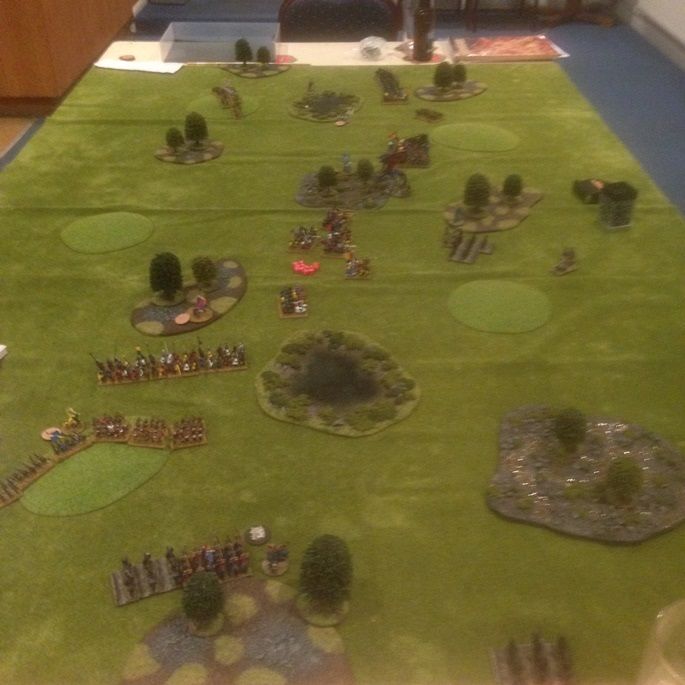
Pic 1 Starting point
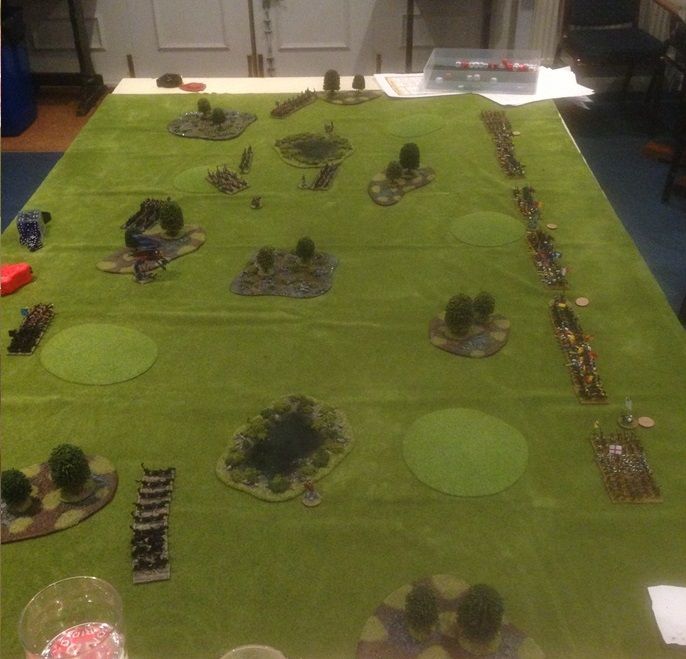
Players then rolled to start and the Brettonians won and started. Only the Brettonian general passed his command roll so his knights nudged forwards to improve the initial position, I'd be amazed if you can tell which ones moved in the next picture.
Chaos fared better and moved his troops forward, but this is warmaster, not every command roll succeds. The Chaos player was wary of the Brettonians charge and didn't push fowards as far as he might. As ever in this game it can be unwise to move brigades forwards into isolated positions. Both Chaos Sorcerers cast Anger of the Gods. At 4+ I think this is an excellent Chaos/irritaiing for opponent spell, as it can break up what might have been a strightforwards advance.
Pic 2 End turn 1
At this point I failed to take enough pictures as events moved quickly.
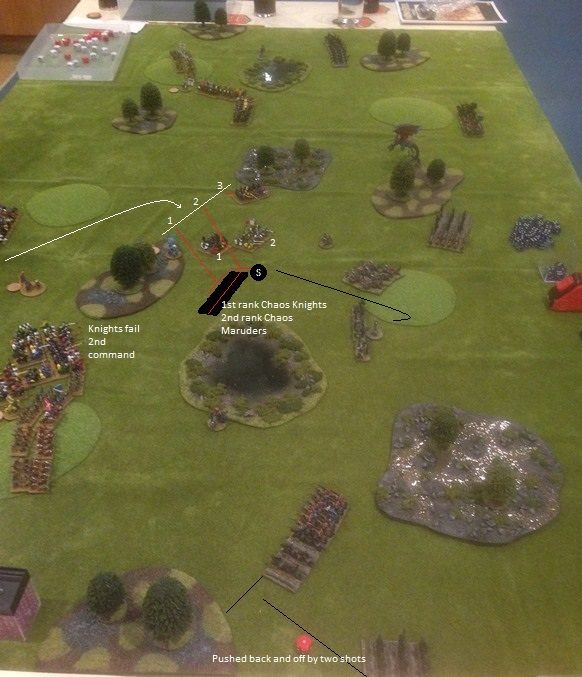
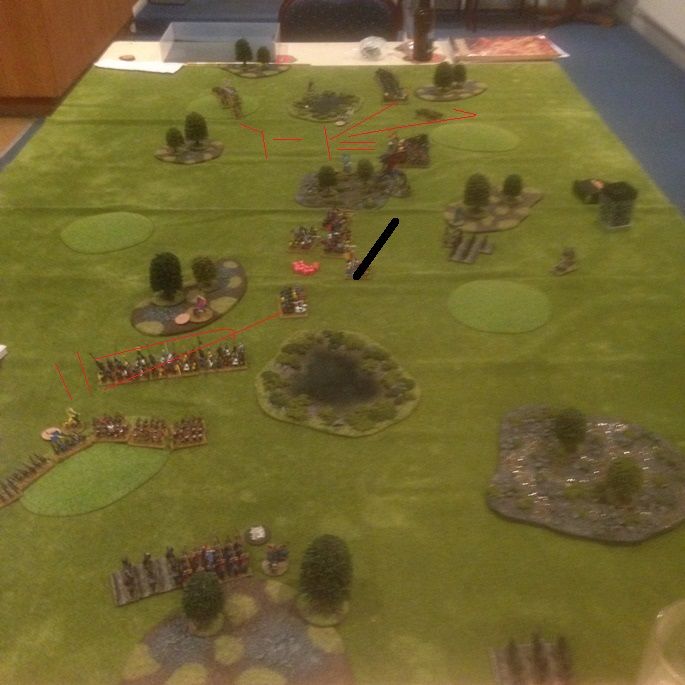
So Pic 3 is a reconstruction for turn two.
The Brettonian left wing infantry moved and took position on the hill, the knights then passed and moved up to protect their flank and face off the still unmoving chaos infantry opposite.
On the right flank the infantry reached the hill. The knights were command forwards with an intent to hit the Chaos knights in the center table but the Sorcerer with them had cast Anger of the Gods, so they stopped within 30cm of the Knights but 33 from the Sorcerer, despite such cunning they failed the 2nd command so no charge.
Undaunted a brigade of knights in the centre were command forwards but declined, the General now took part and commanded the last brigade which moved three units to the line shown; positions 1, 2 + 3 again within 30 of the enemy but 31 from the Sorcerer. A succesfull 2nd command moved the Knights into the chaos units as shown the third knights with no target moved to the edge of the marsh. As a result of being passed through by the knights, the Chaos Sorcerer moved to the Harpies as shown.
The infantry fired at the chaos hounds both hits scored and the pushback roll moved them off table but with a 4 were straight back for movement in their turn. However as they had become detached from the brigade and due to continued failed rolls they took no further part in the battle, so good shooting.
The Enchantress cast shield of combat on the Knights (1),
(yes we did forget to attach her).
The Knights won the first round of combat by 2 and pushed the enemy back 1cm, a stand of Marauders was lost no chaos knights, but unfortunately for chaos 1 stand of knights was lost as they retreated in to the impassable lake terrain. Ironically if they had lost a stand this would have been avoided.
It needed a third round of combat to finish off the chaos Knights and with no target within 10cms the knights fall back to the shown positions.
(The Chaos hounds were within 10cm but out of view because the Knights (2) were facing the rear and side of the Marauders, so had flanks and rear facing the Hounds.)Pic 3
In reposte Chaos moved its left flank to attack the infantry on the hill, but a failed 2nd roll left them threatening instead, the Chaos hounds charged into the knights the command roll for the harpies blundered: result charge nearest visible enemy deemed to be the other knights, which meant the harpies flanked themselves as shown, the last command moved the infantry brigade forwards but failed the intend 2nd roll that would have put them on the flank of the knights.
(We note we failed to move the Sorcerer with them, could he have left once in melee?)Also can a character join and stay with a flying unit when it advances if he has no flying mount?The first round was a win to the Brettoninas who pushed forwards (two bases of harpies lost and one chaos hounds) but the second was a draw both sides moving back, Chaos won the draw so moved after the Brettonians
Both sides falling back/forwards but not crossing the combat line the Brettonians lined up by good fortune in brigade formation with the Knights by the marsh whilst the chaos hounds and harpies moved behind the Chaos Infantry group to lick their wounds.
Pic 4
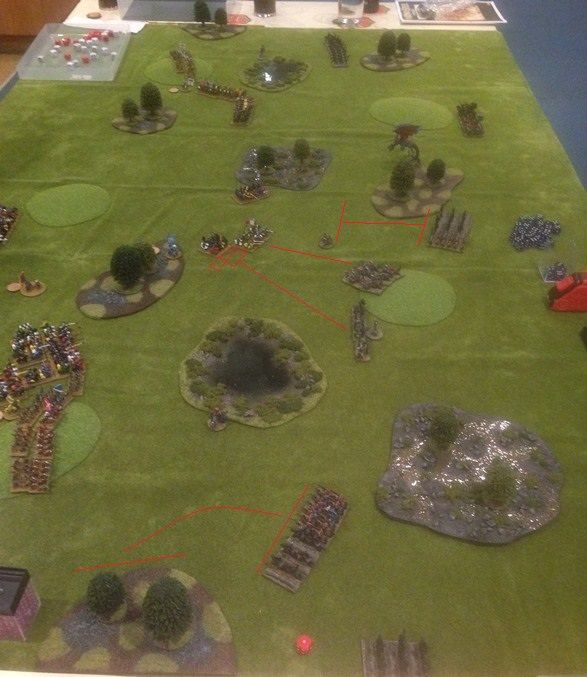
Again apologies no picture taken at the right moment instead this is the end picture with units already been taken off or moved out of location.
The Archers evaded into a line across the hill, I cant recall if the knight by the marsh used initiative or were ordered to charge the chaos infantry (represented by the black line).
The Brettonias infantry at the bottom was ordered to move and formed up with the archers. The Knight behind were moved and the Chaos Infantry (represented by the black line) was just in charge range of one unit which hit them in the flank joining or to be joined by the other knights the others lined up to support the infantry.
On the left wing the knights advanced and then moved again two charging into combat with the chaos infantry in front of them a third hitting the unengaged unit to their left in the flank with the last moving to a position towards the rear as shown.
In the shooting phase the archers pushed the chaos back against the wooded area, and as they rolled a 6 achived a confused status.
In combat the centre four knights taking on the infantry slowly chewed through them. It became clear that when they won they would advance into the harpy and chaos hounds stands behind them and this would end the game.
Pic 5
The other two combats weren't fought as Chaos conceded the game.
final pic
Some of the biggest problems faced by chaos thoroughout the game were his own command rolls, as ever he sufferred
