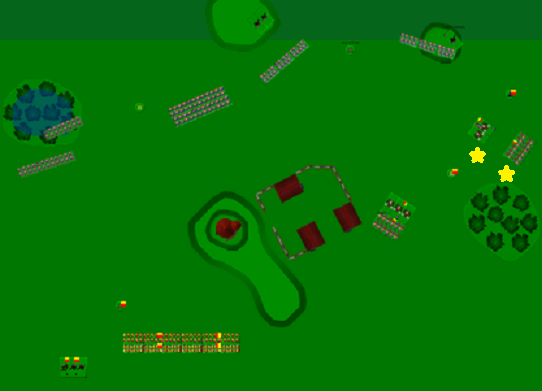
Empire Turn 3 saw everything that could get thrown at the Thunderer and Flamecannon bunker. One stand of Knights was lost to the Flame Cannon, and both Dwarf units were killed (two red stars). I meant to reform the Pistoliers (flank to the cannons is bad...) but we couldn't find the right bit in the rulebook in time, so I just skipped the reform for the sake of time (this was a continuing theme. The rulebook is poorly laid out, and the living rulebook doubly so. The contents page isn't very informative, and the page numbers may as well be from a random number generator).
Other than that, the Dwarfs hadn't yet seized the village, to my surprise, so I did! This is one time when the awkwardness of pivoting came up. I discovered my current template isn't suitable for brigades, so ended up going with the strange formation seen rather than mess around too much. I figured I could get it neatly sorted soon...
My characters also moved a bit, so I've given them their letters to make it clear.
Unfortunately I forgot to take a photo of the end of the Dwarf turn. I'll try and mention relevant things with the next turn.
Empire turn 4
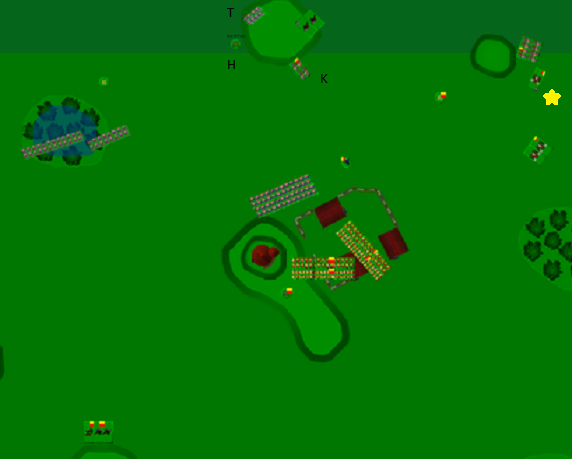
The Dwarf warriors had decided to take an interest in the village, but failed the crucial roll to charge. In the Empire turn, the humans decided to follow suit, completely failing to make the most of the village. This was bad.
Dwarf shooting had been focussed on the poor Pistoliers, who lost two stands. The drive back roll was quite poor though, so they survived (yellow star). In the Empire turn only charge was from one Knight unit, by initiative, into the Thunderers who stood in the open.
Unfortunately, it was around this time in the game that a sneaky Dwarf replaced my General with a cucumber, much to the detriment of future plans. Nothing went to aid of the lone Knight unit.
To make matters worse, the Thunderers turned out to be surprisingly nasty. 2 stands of Thunderers lost to 2 of Knights, before an eventual drawn combat that left the Knights badly exposed (K and T on the board).
I forgot to take an image of Dwarf turn 4, but the gist is:
Dwarf Turn 4
With the Empire flank still exposed to them, the Warriors couldn't resist and got stuck in, joined by their Hero. In hindsight, I should have used an evade move to adjust my facing, even if it cost me the village. The result was fairly predictable, despite the defended status*. One Crossbowmen and One Halberdier unit evaporated for the cost of 2 stands of Dwarf Warriors (who had a Hero amongst them). I liked this opportunity, despite the cost.
At the top of the board the lone Thunderer stand moved to claim a defensive position again, and hell rained down on the Knights from Rangers, Thunderers and Cannons. Unfortunately the Dwarfs used the new-fangled Nerf weapons instead of their usual ones, and the Knights were hardly even driven back.
The Dwarf General went off to hide behind some trees. I really don't know why, but probably don't want to go wandering barefoot in that area.
*We counted the village as being defended for any attack that had to go through the village to reach the defenders. We also allowed support to count, which we probably shouldn't have in hindsight. We also played the village as if it were a forest- the wall marked an outer boundary, but within that area movement was unrestricted (no impassable buildings, etc.).
